GIMP Tutorials: The Fade Out Trick
Sometimes, you find an image you want to use as the basis for a wallpaper, but the dimensions are just terrible. You think there’s no way this image could work as an NXE Wallpaper without some major modification. Well this little trick may just work for you.
NB This trick will certainly be achievable in Photoshop, but the following instructions are for GIMP.
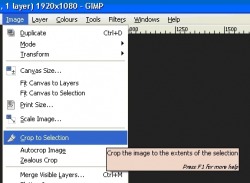
Cropping
Right, for starters load up your image into GIMP. Is the focal point of the image in the middle? With lots of images – especially ready-made wallpapers for PCs and home computers - this is definitely the case. If so, we obviously want to move this focal point up to near the top of the screen. So to do this we can simply crop the top of the image away:
|
|
 |
 |
|
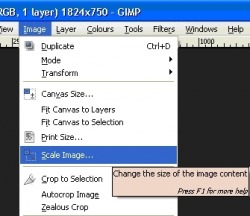
Rescaling
|
|
 |
 |
|
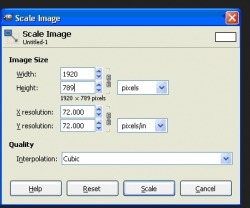
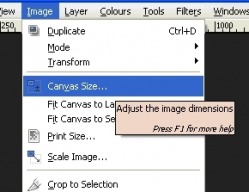
As we can see my image is 1824 X 750, so the closest would be to scale it up slightly to 1920 X 1080. So in the box that appears, I would type ‘1920’ into the width field. Unless told otherwise, GIMP will try to keep the aspect ratio of the image correct, so if we click into the height field, it will auto change it to match, now reading 789, as seen above. Obviously this is nowhere near 1080, but that’s ok – that’s where the fade trick comes in!
|
|
 |
|
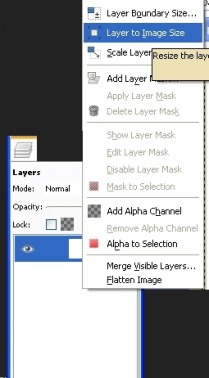
6. This time, we DON’T want it to keep the aspect ratio. If we were to type ‘1080’ into the height box, it would change the width to match, so we’d end up with an image wider than 1920. So we have to tell GIMP not to keep the aspect ratio the same. We do this by hitting this button to ‘unlink‘ the two proportions. |


7. Now these are ‘unlinked’, one won’t affect the other when changed, so type ‘1080’ (or the number matching the original width you put in) into the height field.
The Fade
|
|
 |
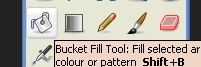 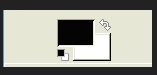 |
9. So next, decide what colour you want to use. Black tends to work well, especially if the lower section of your image is dark in colour. Having said that, there’s no reason why you shouldn’t experiment with other colours! Let’s assume that you chose black. Select the Bucket Fill Tool, and select the colour black (probably already selected by default if you haven’t been editing previously). Click once in the white area to fill the entire block black. |
|
|
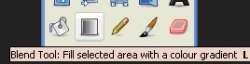 |
11. Put the cursor at the very bottom of the image, click and hold the left mouse button, and drag the cursor a few inches up the screen. Make sure the line is exactly vertical if you want a perfectly even horizontal blend. If you don’t like how much it has blended, undo it (Cntrl-Z) and try again, making the line shorter or longer. Experiment with it to see which look you prefer.
For a couple of examples of where I’ve personally used this, see my L4D Suit Zombie and Resi 5 wallpapers!
 |
 |
So that’s all there is to it! Test it with the NXE Template to make sure it looks good, then save it as a JPEG at the highest quality. Move it onto your XBox and test it there – if it still looks great, consider submitting it to the site!
